Contents +
How to fix WordPress form emails not sending: Practical WP Mail SMTP configuration
Source: 创同盟
Date: 2026-10-27
Views: 89
The previous article opened up two pathways: others can deliver emails to you, and you can also send emails to others using your domain email address.
But there's a third way for the website. The form you put on the contact page—after the customer fills it out and clicks submit, a "submission successful" message pops up—this email doesn't use the system you just configured.
It uses WordPress's built-in email sending function, which ultimately hands the email sending to the local PHP server. There's no username/password, no signature, and no sending history. This channel is partially disabled on most hosts, and some aren't even open.
This results in three possible outcomes: it might be flagged as spam by Gmail and Outlook, silently discarded by the recipient's server, or never actually sent but the plugin still shows "sent." The third scenario is the hardest to detect because you won't see any notifications.
There's only one way to fix it: install an SMTP plugin to take over wpress's email sending and change it to use the email address you configured in post #8 for authentication and sending.
First, determine whether the message "was not sent" or "was blocked".
The methods for fixing these two situations are different, so don't just install plugins right away.
The quickest way to determine this is to fill out the form yourself on the front end and then check three places:
Your email inbox. If there are emails, it means the connection is working; the problem lies elsewhere, such as the form being sent only to the administrator and not to you.
The spam/ junk folder in your email. If you receive emails but they're in the spam/junk folder, it means the emails were sent but there's a problem with their credibility or content. You need to go back and check the SPF, DKIM, and the body of the email.
There's nothing on either side. This is a typical sending channel problem; let's continue.
Another signal that is easily overlooked is: if you only discover a customer's inquiry after a long time, or if a customer calls to ask, "Why didn't you reply to my email?", then it's probably not that the customer didn't send it, but that the website didn't deliver the notification.
2. Why isn't it using the email address you've already configured?
Because WordPress has no idea you have a business email account.
It calls a built-in function called wp_mail() , which by default hands the email over to the server's PHP environment for processing. PHP then hands the email over to the local mail service, which delivers it directly.
There was no login, no authentication, and no DKIM signature along the way. The recipient saw an unfamiliar server claiming "I am your domain," but had no credentials to prove it, so they could only treat it as suspicious mail.
The setup you configured in Part 8—MX, SPF, and DKIM—is bound to your email service provider's server, not your own web hosting. The two have never interacted.
Therefore, the conclusion is: no matter how well your email address is configured, it won't automatically make the website's emails more reliable. You must explicitly direct the sending action to a verified email server.
Third, before installing the plugin, make sure your email address can be "borrowed" to send emails.
Many people skip this step, only to find that they can't enter the parameters after installing the plugin.
Not all email services allow external programs to send emails. Some require you to manually grant permissions, while others do not offer this feature at all, even with the included service plan.
One last point deserves a mention. If you selected Zoho as the "free" option in section 8, you'll encounter a problem here—its free version only allows sending and receiving emails on the web and in the official app; it doesn't publicly disclose its client protocol. For a website to send emails, it essentially acts as an email client, and without this permission, it won't work.
This is also why the 8th article suggests "Don't just choose a service for the sake of free options": the choice of email address will continue to affect this step.
IV. The differences between the free and Pro versions of the plugin are greater than you might imagine.
WP Mail SMTP was chosen because it has the most users and the easiest wizard, but there is an easily overlooked aspect to its version division.
The plugins in the WordPress plugin library have very long titles, listing Gmail, Outlook, Amazon SES, and Zoho. However, after installing them, you'll find that Outlook/Microsoft 365, Amazon SES, Zoho Mail, Mailjet, Mandrill, SparkPost, and Elastic Email are exclusive integrations only available in the Pro version; they are not accessible in the free version.
The free version actually supports: Gmail / Google Workspace, Brevo, SendLayer, SMTP.com , Mailgun, Postmark, SendGrid, SMTP2GO, and the most common Other SMTP (you need to manually enter the server address and username/password).

If you only installed Outlook because the title mentioned it, and you can't find the options after installation, it's not a problem with your operation. Either switch to Other SMTP and manually enter the parameters, or switch to a service provider whose free version supports it.
Five or seven steps to complete the preparation
Taking the most common Other SMTP as an example, this option can connect to almost any provider.
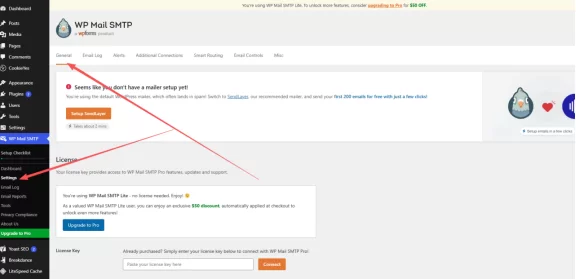
The first step is to install and activate it. Go to the admin panel → Plugins → Install Plugin, search for "WP Mail SMTP", install and activate it. After activation, you should be automatically taken to the setup wizard; otherwise, access Settings from the left-hand menu.
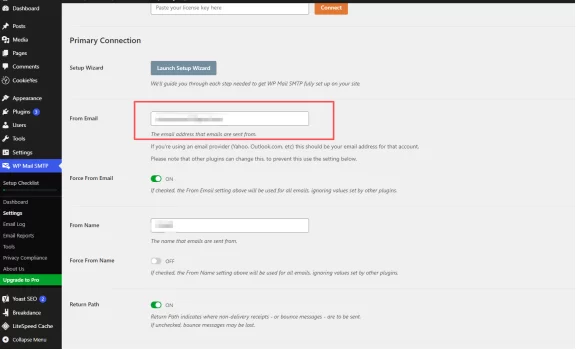
The second step is to enter the sender's email address. This must be an address under your domain, such as sales@yourdomain.com . The default address, wordpress@yoursite.com is often perceived as spam by many recipients.
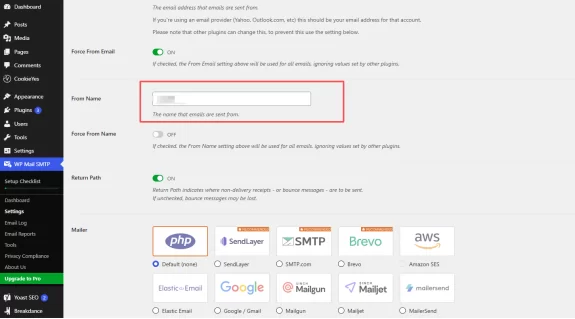
The third step is to fill in the sender's name. Write the company name. These are the four characters your customers will see in their inbox, so don't leave them blank.
Fourth step, enable "Force From Email". This switch forces all plugins to use the address you entered above to send emails, preventing any form plugin from arbitrarily changing it to its own. (Adjust according to your needs)
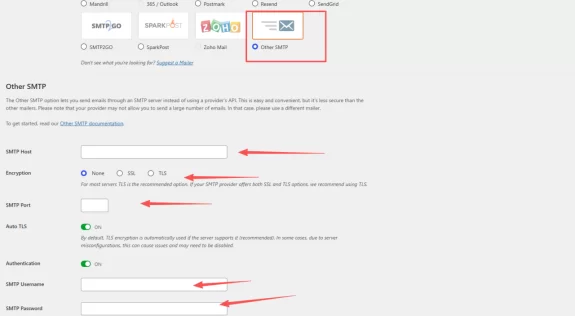
Step 5: In Mailer, select Other SMTP, and then fill in the six fields:
SMTP Host: The server address provided by the service provider
Encryption: Encryption method, SSL or TLS
SMTP Port: The port number must be paired with the encryption method.
Auto TLS: Keep it enabled by default.
Authentication: Enabled, indicating that a username and password are required.
SMTP Username / Password: Email username and password
Step 6: Save.
Step 7: Send a test email. At the bottom of the page, there's an "Email Test" option. Enter an address you can receive emails from and click "Send."
Don't forget these two prerequisite steps: For Tencent Enterprise Email, you need to enable the SMTP service in the web version settings, and use the generated client-specific password; for Google Workspace, if you have two-step verification enabled, you also need to use the application-specific password, or simply select the Gmail option for one-click authorization to skip the password.
Sixth, four places where it is most likely to get stuck.
1. The sending address and login account do not match.
If you log in with sales@ but enter info@ as the From Email, Gmail and Outlook will reject the email or force you to change the sender to the one you are actually logged in with. Both must match.
2. Incorrect port and encryption method.
465 is for SSL, and 587 is for TLS; this is the standard combination. Entering 465 with TLS will cause the connection to time out, and the error message will often only say "Unable to connect," making it unclear where the error is.
3. The host has blocked port 25.
Many hosting providers block 25 emails by default to prevent spam. So don't use 25; use 465 or 587 instead.
4. Changed service provider but SPF not updated
If you only specified your original email provider in the SPF file in Part 8, and now you've switched to Brevo, the recipient will find that the sending server is no longer on their authorized list. Go back and include the new provider in that SPF record.
7. Verification requires checking three levels; don't just trust "sent successfully".
A successful plugin notification only means that it has delivered the email to the SMTP server; it does not mean that the recipient has received it.
The first step involves sending emails to two different email addresses.
Use one of your business email accounts and one of Gmail or Outlook. The same email must appear in both inboxes to be considered valid.
The second layer, check if it fell into the trash can.
If it only reaches the trash can, it doesn't count as passing; it means your credibility isn't high enough. Go back and check your SPF, DKIM, and the linked images in the text.
The third step is to fill out the form at the front desk.
Do not use the plugin's built-in testing function. Instead, actually open the website's contact page, fill out the form, and submit it like a customer. This is because form plugins may have their own email settings that will bypass your newly configured SMTP.
In addition, new domain names and new server IPs have a reputation-building period. Sending one or two normal business emails a day for the first few days is more effective in building reputation than sending dozens of test emails at once.
8. Is the free version enough?
The free version can: send emails, connect to common service providers like Gmail and Brevo, and display basic sending errors.
The free version can't do the following: browse historical email logs, send you alerts when sending fails (email/SMS/Slack/Teams/Discord/webhooks multiple channels), automatically switch to a backup channel when the main channel fails, track open and clicks, provide email delivery rate charts and reports, and intelligently route to different service providers based on conditions.

For factory sites, the decision is simple: as long as you don't encounter situations like "The customer says they sent inquiries but I didn't receive them," the free version is sufficient. If such a situation does occur, what you need are logs and failure alerts; only then is purchasing the Pro version worthwhile. The Pro version is $49 per year on the official website (1 site, 14-day money-back guarantee). If you don't even want to install it yourself, the Elite version is $99 per year, and their experts will install and configure it for you.

End
The entire link is now closed:
Domain name and hosting (Part 3) → Corporate email and DNS four records (Part 8) → Connect website emails to this email address (This part) → Customers fill out forms, and the emails really do reach your inbox.
Only in later articles will we focus on content, keywords, ranking, and follow-up inquiries. If the emails can't be sent out, all the previous efforts are just filling a leaky bucket with water.
After you finish this tutorial, I suggest you do something else: use your mobile phone's traffic app to open the website, fill out the form, and then wait ten minutes to check your email. Those ten minutes are worth more than reading ten tutorials.
Note: Plugin features and version classifications are based on the latest official version. The mailer list for the free and Pro versions may be adjusted with each version. After installation, check the actual available options in the setup wizard. The SMTP parameters for each email service provider are based on the information provided by the service provider's backend.
CTMON: wpress foreign trade website building and website technical configuration
CTMON provides services including wpress B2B export website development, Google SEO optimization, Google Ads advertising, and overseas digital marketing. Configurations like domain names, email addresses, and email forms may seem trivial, but they directly determine whether inquiries reach the sales team. When building a website, we include domain names, email addresses, and email forms in our pre-launch checks, rather than waiting for clients to report "not receiving emails" before investigating.
References and Information Sources
wpress official documentation: https://wordpress.org/documentation/
WordPress official plugin directory: https://wordpress.org/plugins/
RFC 7208 (SPF):https://datatracker.ietf.org/doc/html/rfc7208
RFC 6376 (DKIM):https://datatracker.ietf.org/doc/html/rfc6376
mail-tester:https://www.mail-tester.com/
WP Mail SMTP Official Website: https://wpmailsmtp.com/
WP Mail SMTP Pricing Page: https://wpmailsmtp.com/pricing/
Note: Features, pricing, and configuration methods may vary depending on the plugin version, hosting provider's plan, and email service provider. For specific setup steps, fees, and interfaces described in this article, please refer to the official documentation of the relevant service provider.
What does international social media management service include? 2026 Guide to Social Media Management for Export Businesses
2026-10-28
How to write a WordPress product page that will make overseas buyers want to send inquiries?
2026-10-28
How to fix WordPress form emails not sending: Practical WP Mail SMTP configuration
2026-10-27
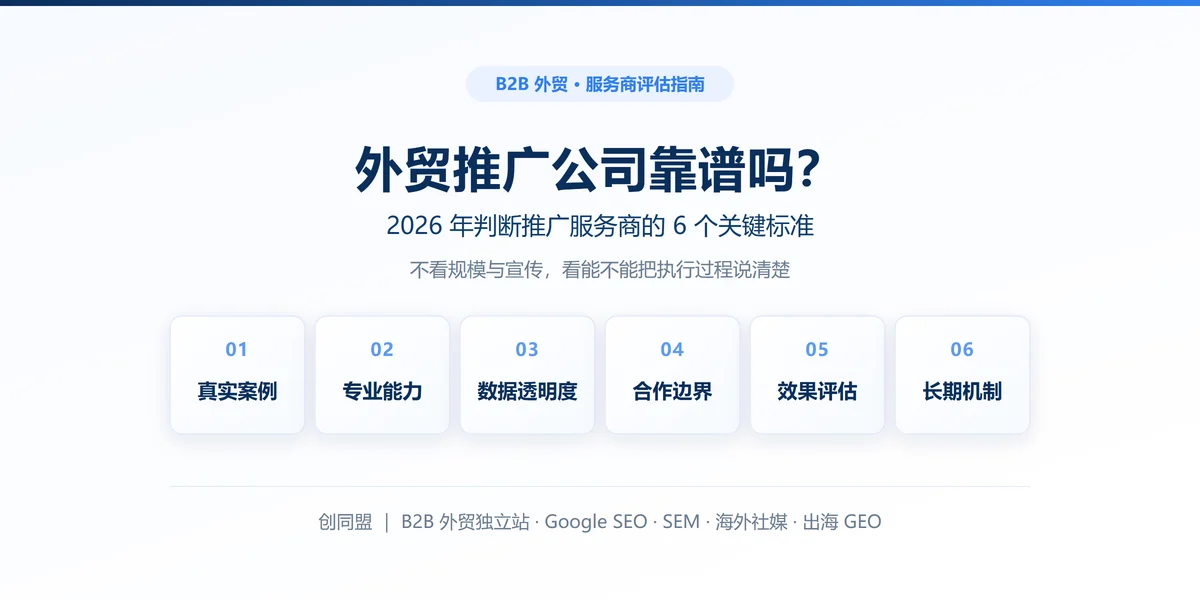
Are foreign trade promotion companies reliable? Six key criteria for businesses to judge promotion service providers in 2026.
2026-10-26
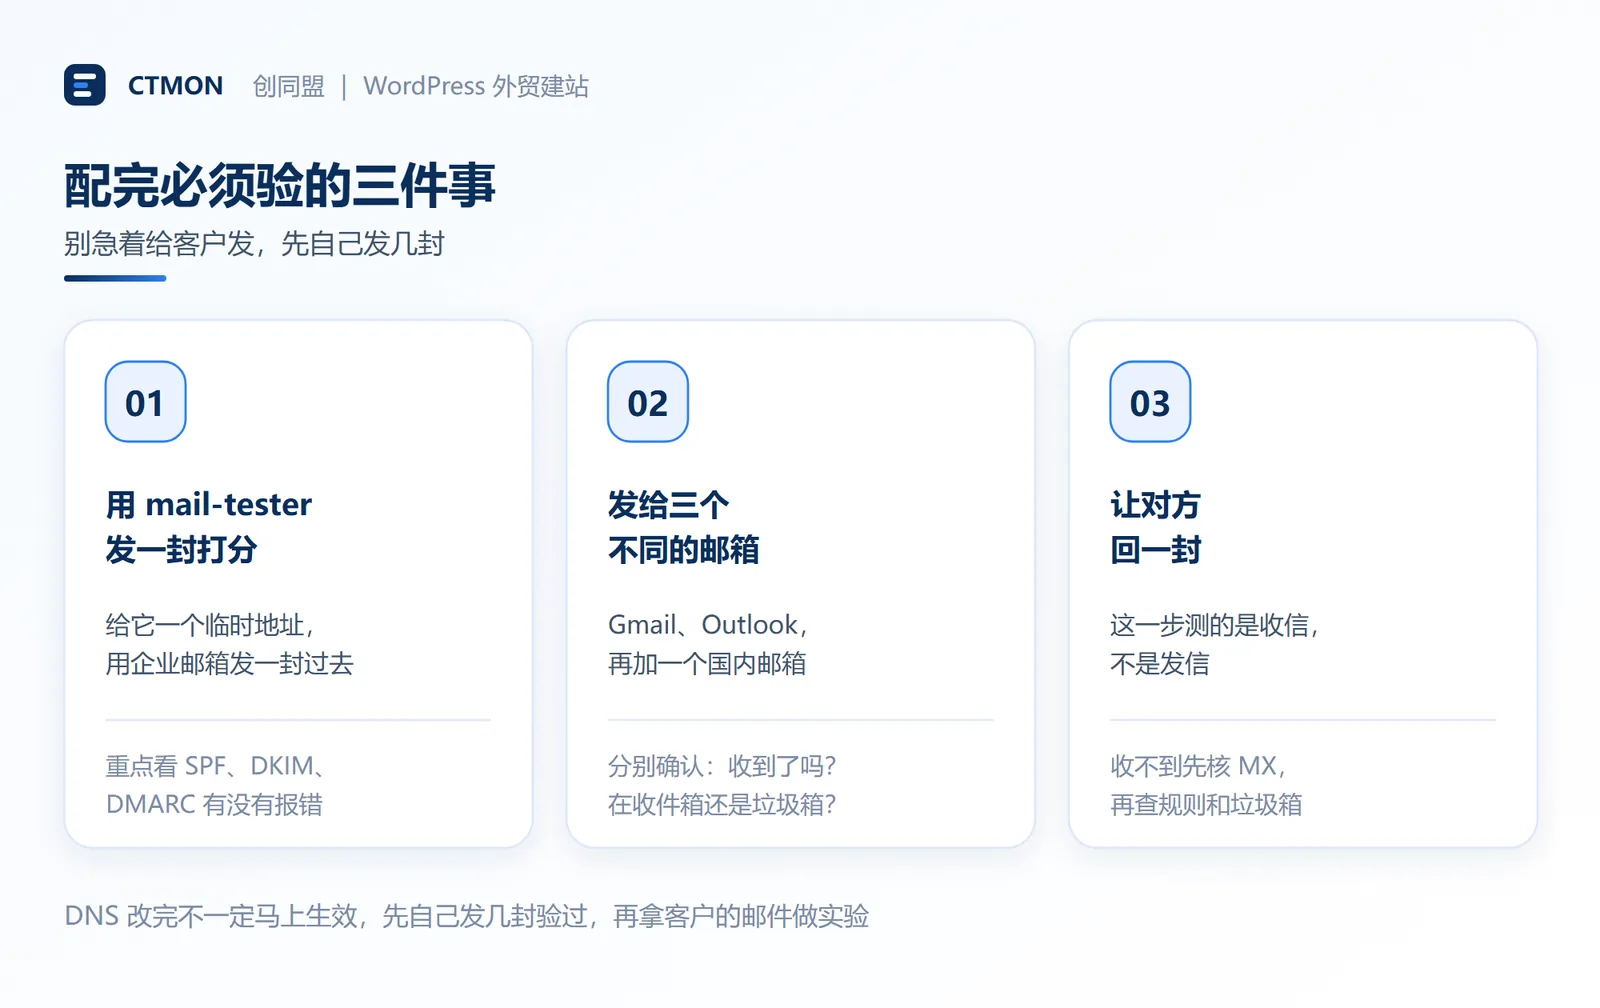
How do I set up an email account for export businesses? How can I configure it to avoid it ending up in the spam/junk mail folder?
2026-10-26
Related Articles
How to configure WPForms contact forms: Which should I choose, WPForms or Contact Form 7?
How to write a WordPress product page that will make overseas buyers want to send inquiries?
How do I set up an email account for export businesses? How can I configure it to avoid it ending up in the spam/junk mail folder?
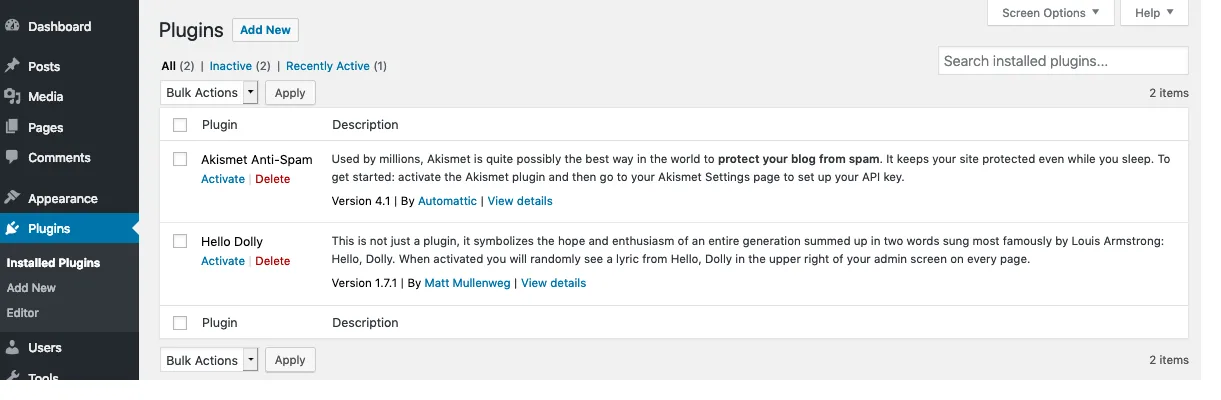
Recommended essential WordPress plugins: 6 types of plugins commonly used for B2B export websites
Essential Pages for a WordPress B2B Export Website: Besides Product Pages, These 11 Page Types Should Also Be Considered

